All posts by AltusHost

How to respond to a negative customer feedback

How to Respond to a Negative Customer Feedback

Getting customer feedback is vitally important for any company. Not only does it provide the invaluable insight you wouldn’t otherwise obtain but also allow you to express your stance on any issue and assure your customers that you have everything under control in a timely fashion.

Modern technologies have made communicating with one’s customers easier than ever before. Instead of relying on snail mail that can be lost or dismissed, clients now can post their feedback on a company’s social media page. While it’s great, if their feedback is negative or critical of the company, it means that the whole world will see it.

Sometimes, the prospect of it sends the company into panic mode. To avoid blunders in dealing with negative feedback, read about the following common mistakes and ways to eschew them!

Deleting any negative feedback

Given how many dangers and threats social media pose, it can be easy to dismiss an overly-negative customer post as an attempt to discredit your business paid for by some shady competitor. After all, what does a client even know about running a company, much less your company?

However, such a line of thinking can lead you to some dark places. When you’re worried that an unfair negative post on your social media may damage your brand, sometimes, the “block user” button becomes incredibly tempting.

But this temptation should be resisted. As they say, the internet remembers everything, and deleting negative comments and blocking critical users will be noticed. And no matter how undeserved those comments are, deleting them will send a bad message to your other customers and potential customers.
And of course, deleting a Facebook comment, for example, won’t stop the person complaining from telling all their friends and acquaintances to stay away from your service. In fact, it will likely do the opposite.

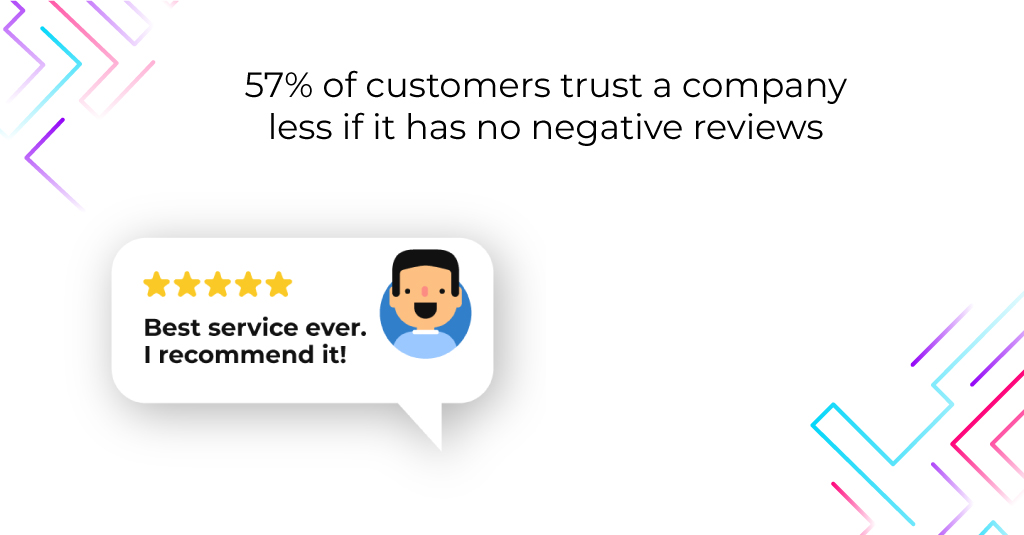
Not to mention that negative user reviews help to make positive ones look more real. According to a Trustpilot survey, 57% of customers trust a company less if it has no negative reviews.

So the bottom line is clear: do not ever delete negative customer comments! The only exception is reviews that threaten you or use hate speech. But even when dealing with such unpleasantries, it’s better to inform a website moderator about it than to take justice into your own hands. Besides, the notion of what constitutes trolling or hate speech may vary for different people so leave vigilantism to Dirty Harry and no one will be able to blame you for mishandling a situation.

Taking too long to address the issue

Few things are as frustrating as long and painful wait for a response. Responses to user feedback are not exempted from this rule.

Our lives today are extremely fast-paced, not in the least, thanks to modern technologies. Your customers expect their issues to be dealt with as swiftly as possible – or at least, to be assured that they will be dealt with shortly.

With social media and the internet, you don’t have any excuses for not looking into the issue ASAP, and your clientele knows that.

Even if the problem itself takes more time to fix, you should get back to the customer and let them know the solution is coming. It’s never a bad idea to apologize for the inconvenience, either, if there is a delay.

Using copy and pasted responses

This mistake is particularly common. It’s likely because of the feeling it gives you: the feeling that you’ve done away with a problem. After all, you didn’t ignore the negative post, right? You replied, “Thank you for your feedback, we’re looking forward to providing our services to you in the future”. It took you all of five seconds. Well done?

Not really. Especially you give the same response to ten other comments on the same page.

It’s also necessary to understand that even if you fixed the problem the customer was complaining about, you should do better than to resort to a standard faceless response.  If you can rectify the issue that a customer has with your company, you shouldn’t keep it quiet!

Indeed, eliminating any issue can be a great boost to your company image. Nobody really expects you not to have any hiccups ever, that’s just not realistic. However, when people see that you are quick to improve and do your best to provide great customer service, they tend to think higher of you and your business.

So the takeaway is this: give personal responses to criticism. A very simple but effective tactic here is to reiterate the customer’s problem in your reply. Let’s take a look at this example from Tripadvisor.com:

The hotel manager doesn’t only refer to the complaining customer by their name but also sprinkles some information unique to this particular case in the second sentence of the reply.

Of course, this strategy works great whether you run a hotel or design websites for one simple reason: it shows the customer that you care about the issues they’re having.

Another thing to show your human side is to express empathy. Just a short mention of how you got in a similar situation will go a long way to give you and the customer some common grounds.

_____________________________

Blog Author: Dean Chester

Dean Chester is a practicing cybersecurity expert and author of numerous articles on Cooltechzone and other tech websites such as Sensorstechforum, Bdtechtalks, AT&T, OpenVPN, etc. Dean is a fan of all topics related to data privacy and cybersecurity. He usually takes part in various tech tutorials, forums, conferences, etc. He can be reached at twitter@DeanChe36640282

How to Easily Import Tumblr into WordPress

How to Easily Import Tumblr into WordPress

Seeking import Tumblr into WordPress? Due to a builtin tool from WordPress, it really is unbelievably simple to migrate your own content out of Tumblr for your very own personal WordPress website. The truth is that upon getting yourself tiny housekeeping from this way in which, the majority of the procedure is completely automatic.

Within this piece, we will start discussing the consequences of migrating out of Tumblr into WordPress.

Afterward, we will explain just how exactly to export Tumblr into WordPress in 5 straightforward actions.

What you want to consider when you migrate from Tumblr to WordPress

Tumblr websites are relatively easy when it comes to their composition. At their core, you’ve articles, that can comprise both media and text elements:

Considering that Tumblr is mostly micro-posts’, importing its content to WordPress is simple normally.

Your articles should look mainly the same within WordPress, with two caveats — WordPress can’t import’re-blogs or enjoys, as they are indigenous to Tumblr.

In addition, you won’t be able to bring along your exact Tumblr design. But there are thousands of paid and free WordPress themes, so you are probably able to find something about the same (and maybe better).

Steps to migrate from Tumblr to WordPress

Before you may import Tumblr into WordPress then you need to purchase web hosting and then install the WordPress software Otherwise we can take help from WordPress development company for the installation

If you’re not certain about the way to do that, you should check out our guide on what steps to take to best to generate a website using WordPress. Entire steps 1 3 and then come back here in order to import your Tumblr content into WordPress.

Or, even if you already have a fresh WordPress install prepared to go, then you can jump into importing your own content. Here is how:

1. Register a Tumblr application

WordPress comprises an integrated application to manually successfully automatically export Tumblr into WordPress. In order to get this particular specific tool, you will have to offer it consent.

To successfully Do So, you Have to Produce a’ Tumblr Program’ which Gives You the Opportunity to join either program:

⦁ Sign into to Tumblr
⦁ Open up your own accounts configurations
⦁ Seem to your Programs tab onto the menu for the Ideal

Around the next display, Tumblr can request that you enroll to utilize its API should you’ve not done. Click the Sign-up button and Choose the Sign-up program alternative over another display:

You need to fill some sort out. Here Is What to input each area that is Essential:

Application name: That can be really for your own reference only, therefore proceed with all those names you’ll want.

Application website: Enter the URL of the own WordPress Site.

Application description: That can be added for the own eyes so write everything you’d like.

Administrative contact email: don’t hesitate to make utilize of precisely exactly the exact identical electronic mail you enrolled Tumblr with.

Default callback URL: Enter the URL of the own WordPress site formerly again.

Once you are finished, scroll on the base of the monitor and affirm the enrollment. Your program details are going to show up on the display:

You will discover there is some information about your program underneath its name. You’re going to need that the OAuth Consumer Secret at a minute, as well as your key. You can reveal the latter by simply clicking the Display secret key choice.

Obviously, we’re not revealing you either of ours as, effectively, they’re secret! But, keep this tab available for now, open a new one and head to your WordPress dashboard.

2. Add your application keys to WordPress

As we’ve mentioned, you’re likely to use an integrated importer tool to accomplish the heavy lifting of transferring your Tumblr articles to WordPress. To get this done, go to the Programs > Import tab within WordPress. Right here, You Will Locate an alternative that says Tumblr — select the Set up Now option below:

It will only have a couple of minutes to your own importer to install. When it is ready, the Install Currently button will be replaced with an option reading through Run Importer. After clicking this, then the importer will automatically help you through the process of producing a Tumblr app. Obviously, you’ve done this already, therefore skip right on down to where it asks you to the OAuth Purchaser Critical along with Key

You may then need to go back once again to the open tab from earlier and copy both keys over to WordPress. When you have added both keys to their individual disciplines, just click the Connect to Tumblr button in WordPress.

If that is so, the plugin will likely Request That You authorize the relationship between the two programs — proceed Beforehand and do so:

Tumblr will then Request That You verify the authorization:

Once it has finished, you are all set to start the export procedure in earnest.

3. Run the WordPress Tumblr importer

After approving the link amongst both programs, you are going to observe a break down of one’s Tumblr site and its particular articles. From that display, You Can Choose that the WordPress writer That You Want to attach your Tumblr articles to

The moment you decided, hit on the Publish this site button and then permit WordPress to function its own magic. This region of the procedure could have a little while based on just how much material you are employing and also your WordPress website host.

Even though the plugin is currently performing everything, You Are Going to Observe an”In progress” message

The moment it is finished, a victory message will be, so that your articles will be already ready. First, to look at your chosen Tumblr articles, go to this Articles tab and then start every one of those items.

You are going to see that there are lots more choices to personalize and format your articles.

Moreover, your WordPress site may appear much different from which you used to on Tumblr. But this is sometimes adjusted.

4. Try to match your Tumblr design

Right out of the box, WordPress utilizes themes with incredibly tidy, modern layouts. They do not look bad, but they are not as fun (or familiar) as your Tumblr site’s style could have been. An easy and simple way to correct this is by putting in new themes — WordPress lets you use free or premium selections.

Once you locate a motif that you like, you are able to put in the new theme and customize it using the WordPress Customizer.

In the event you prefer to simply take this a stage further, web page builder plugins such as Elementor enable you to develop into a programmer and provide full management over your site’s design and also look. This element of WordPress can be overwhelming in the beginning time. WordPress development services provide a very attractive site design.

5. Redirect your Tumblr domain to WordPress

There is yet another depth to treat until you are finished — in the event that you’re utilizing a personalized domain name with your Tumblr site, you’re going to wish to divert it in direction of WordPress. To successfully do so, you are going to want to gain access to your domain and upgrade your own name servers to tip in Tumblr into WordPress. In case you are not certain about the way to complete so you will request your internet host service for assistance.

But in the event that you utilized a Tumblr sub-domain (such as username.tumblr.com), the method becomes somewhat more straightforward since you can not divert a Tumblr subdomain inside this manner. A workaround may be to generate a single very last Tumblr site article, pointing persons on your brand new site. But you might like to fix this together with code.

To begin with, get into the Tumblr dash and then click the Zoom look possibility. After that, click on Edit:

Then Start Looking for That Edit HTML alternative from the menu:

A whole lot of all HTML may be, however, avoid being intimidated. Search to the tags and glue the next code involving these. Be Certain to substitute:

The previous snippet will not require some editing, which means that you’re secure to conserve the alterations to your own HTML. Nowadays, whenever someone attempts to get only one of one’s Tumblr articles, they will certainly be redirected into WordPress alternatively!

_____________________________

Blog Author: Rohit Jangid

This image has an empty alt attribute; its file name is RohitJangid.png
Rohit Jangid as a Digital Marketing Executive in the leading WordPress Development Company named Techno Softwares and there he handles all works related to SEO, SMO, PPC, SME, Content Writing and E-mail Marketing Works.
5 things you can learn by using Google Search Console

5 things you can learn by using Google Search Console

My website is the best and there’s nothing that should be improved. Said no one, never. Everyone who has a website would like to see it progress and develop, don’t you agree?

Nowadays, when you literally need to pay for everything, it’s very neat to find free tools that actually work and have a purpose. Google itself has several free tools that you need to start using today because it will save your life 👍

Today, we’re going to be tackling this amazing Google tool called Google Search Console that helps you measure your site’s search traffic and performance, fix issues, and make your site shine in Google Search results. Not bad? Let’s get  started 🔎

How to set up Google Search Console?

To be able to utilize all Google Search Console benefits, you firstly need to set it up. To start, click on this page, and sign in to your Google account. Please note that this has to be the same account that other Google tools are set up with. If you’re just getting started and this is the first tool you’re using, no worries, simply sign in with your most-used Google account. 

After signing in, a window will pop up and all you need to do is enter your website’s URL. After you’ve done that, click “CONTINUE”.

Verification time ✔️ Now it’s time to verify your website and  Google Search Console allows you to do this in multiple ways. For example, if you already have your Google Analytics set up, the easiest way to do this is to select Google Analytics Tracking code, as long as your Google Analytics tracking code is located in the <head> section.

You can also verify it by adding an HTML file to your website, meta tags to the homepage or complete the process on the Google Tag Manager or change DNS settings. 

What can you do with Google Search Console?

1. Sitemaps  

Sitemaps represent the list of all website pages that help web spiders (web crawlers, ant, automatic indexers) to more efficiently collect information on pages and its links. Having sitemaps with Google Search Console is very important, as you’re helping the search engine to better understand the relationship between pages, identify which pages are more important, but also to discover other important data such as when the page was last changed, how many times and so on.

How to add sitemaps?

Step 1: Choose which sitemap format you would like to use, as Google supports many formats. You can also create the sitemap itself on your own or use some other third-party tools to do so.

Step 2: Add the sitemap in Google Search Console – Index > Sitemaps 

2. Reporting

Anyone who comes to your website through a web search had to use a specific term that led him to that website/page. This tool shows the most frequently used phrases or keywords that people searched and opened your website. But, that’s not all.

Under the “Performance” tab in the reporting section, Google Search Console provides an insight into how your website is ranking on search engines when it comes to keywords and most visited pages. You can also better understand where your visitors come from, as well as which devices they used to look through your website.

What you can also do is select a specific time frame and get information on total clicks, average position on search engines, total impressions or the number how many times your website showed in search results and an average CTR (click-through-rate), which is the ratio between the total number of clicks and number of impressions. 


3. Mobile-friendly website

We all know that most website visits are nowadays made over smartphones, so it’s a must to ensure the website is mobile-friendly. But, how do you check this? The easiest way to do it is to check it yourself. There’s also an option that Google Search Console itself checks if the website satisfies mobile device standards.

How? Under “Enhancements”, choose Mobile Usability. If Google doesn’t show any errors in the report, you’re good to go.

If you get some error, this report will help you identify which specific parts of the website are not working properly on mobile phones, such as flash or small fonts.

4. Backlinks

Anyone who remotely cares about SEO will be interested in backlinking. Links that lead to your website but are present on someone else’s website are called backlinks and represent one of the most important criteria for ranking, as any time someone clicks on the links and comes to your website, your Google ranking improves and you get a higher approval rate.

This information can be found under the “Links” section on the left-hand side. If you click there, you get to the report which shows the total number of external and internal links. External links represent all pages in which links are on someone else’s website, whereas internal links are links that are located within your website. 

If you want to see which website has most links towards your website, all you have to do is select the “Top linking sites” tab, and “Top linking text” if you want to find out which name or keywords set your website is linked. 

By clicking on any word, site or page within this report you can further analyze each result.

5. Error, error on the wall

Bad links, unindexed pages, and 404 errors are known to harm the customer experience. Not only your customers and visitors will see you badly, but the Google algorithm will, too.

Under Index > Coverage, you will find a report that summarizes link status in the eyes of Google search engine, such as the number of indexed pages, as well as pages that have index problems. 

This valuable information can be used to enhance customer experience and prevent terrible and frustrating errors to occur.

So?

Google Search Console is a tool that is completely free and can be used to better understand, analyze and improve your website’s ranking. This webmaster tool is a place you should refer to in the first place and use it regularly. 

Until next time 😉


secure and optimize wordpress

How to Secure and Optimize WordPress?

As one of the most popular CMS today, WordPress is usually the first in line when it comes to finding security vulnerabilities. Why? Well, what happens is that many people usually just create a website and once it’s up, they rarely or never maintain it. That causes many glitches in WordPress themes and plugins, but also our system admins to have daily headaches 😉 Even though our web hosting has several advanced malware & exploit scanner that works in real-time, sometimes there are so many omissions that there’s no more help to it and such website goes down or worse – continues running with all those hidden malicious scripts that redirects its users to various ads and spam messages that are being sent on your or someone else’s behalf. Not cool, right?

We know you don’t want this to happen to your site, so here are 7 steps to secure and optimize your WordPress for the best possible experience. 

1. wp-config.php is the key 🔑

You’ve probably seen this file before which, in addition to database connection data, it can also contain some additional parameters, such as: 

WP_DEBUG – turn it on when you have a problem with your website and you can’t detect the bug, otherwise, it should always be under the off option

WP_POST_REVISIONS – does not save more than XX revisions and we think 10 is the perfect number. This way, your database size is reduced and there are no unnecessary post and pages’ edits.

EMPTY_TRASH_DAYS – used to delete pages or posts that are in the trash. We recommend that the period should not be less than 10-20 days. 

WP_ALLOW_REPAIR – useful if the hosting server experiences a problem, a sudden reboot, or a similar hardware or software error. That’s when the chance that some of the active tables crashed is over 20% and you need a REPAIR or database recovery. This command will automatically run REPAIR tables as soon as visitors arrive.   

WP_MEMORY_LIMIT – virtual memory limit that is WordPress uses and here is the recommendation that it is set to at least 512M. 

WP_CRON_LOCK_TIMEOUT – it is useful to increase it to 480 seconds so that it does not restart with every new visit. What you can also do is turn it off completely, but we don’t recommend this. 

But, what is a cron? To put it in simple words, a cron is a job, some sort of a trigger. So, each visitor serves as a trigger to WordPress which has a task list that needs to be done, from article posting, various types of updates, comments, etc. 

define(‘WP_DEBUG’, false);
define(‘WP_POST_REVISIONS’, 10);
define(‘EMPTY_TRASH_DAYS’, 20 );
define(‘WP_ALLOW_REPAIR’, true);
define(‘WP_MEMORY_LIMIT’, ‘512M’);
define(‘WP_CRON_LOCK_TIMEOUT’, 480 );

WP cron starts with every new visit and if you want to turn it off completely, which, by the way, we do not recommend (the better option is to time-limit it), you can use the command below. 

define(‘DISABLE_WP_CRON’, ‘true’);

Would you like to disable theme and plugin updates and prevent unauthorized users from doing the same? Then use the following commands. 

define( ‘DISALLOW_FILE_MODS’, true );
define( ‘DISALLOW_FILE_EDIT’, true );

If you use a CDN such as MaxCDN or JetPack, it is recommended to define the cookie, as this increases the website’s speed. 

define( ‘COOKIE_DOMAIN’, ‘domainname.com’ );

If you’re a writer, you know the autosave function can come in handy, but please know that using it too often can represent an additional burden to the site, so we recommend to increase the autosave time to 180 seconds. 

define(‘AUTOSAVE_INTERVAL’, 180);

If you use open/public WiFi networks, make sure to use HTTPS connection when accessing the WordPress Admin panel. We strongly recommend not doing any WordPress setups if it’s not configured to HTTPS or you don’t have an SSL on your site).

This is the command to access the WP Admin panel so that it’s encrypted:

define( ‘FORCE_SSL_ADMIN’, true );

2. Don’t’ forget about .htaccess

If you use Apache or LiteSpeed server as your primary one, you likely have the .htaccess file. This file is hidden, but you can find it through FTP/SSH, as it’s more visible than other files due to the fact it has the period prefix (.htaccess).

It is recommended that you deny public access to xmlrpc.php and wp-config.php files for security reasons. 

<Files “xmlrpc.php”>
Order Deny,Allow
Deny from all
</Files>
<Files “wp-config.php”>
Order Deny,Allow
Deny from all
</Files>

The .htaccess file must also contain the following part, even though it’s probably already there. If not, please know that it’s necessary because otherwise the mod_rewrite will not work and you will encounter errors on the site in the form of not found pages (and nobody likes to see those pages, right?)

<IfModule mod_rewrite.c>
RewriteEngine On
RewriteBase /
RewriteRule ^index\.php$ – [L]
RewriteCond %{REQUEST_FILENAME} !-f
RewriteCond %{REQUEST_FILENAME} !-d
RewriteRule . /index.php [L]
</IfModule>

Also, mod_deflate, mod_mime, mod_setenvif commands are often used to enable caching. 

It is super important that you turn on file indexing to prevent bots from running around your site folders – all results will be redirected to the website itself.

Options All -Indexes

Comments on WordPress are generated by spam and there can be a lot of them every day. If you believe they are necessary, make sure to use Akismet plugin or CAPTCHA protection. If not, make sure to completely block it through .htacess:

ErrorDocument 503 “Comments forbidden”
RewriteEngine On
RewriteCond %{REMOTE_ADDR} ^60.173 [OR]
RewriteCond %{REMOTE_ADDR} ^218.10
RewriteCond %{REQUEST_URI} ^/wp-comments-post.php$
RewriteRule .* – [R=503,L]

In case you want to redirect WordPress traffic to HTTPS (even if the page is not set up like it) use this:  

<IfModule mod_rewrite.c>
RewriteEngine On
RewriteCond %{HTTPS} off
RewriteRule ^(.*)$ https://%{HTTP_HOST}%{REQUEST_URI} [L,R=301]
</IfModule>

3. Permissions

You can change file permissions on WordPress through File Manager in cPanel, FTP or SSH. As the most sensitive file on the entire system is wp-config.php, make sure to set permissions 0400 and 400 to it (r——–). When setting up like this, only the server owner can read and modify the tile.

Wp-content, wp-includes, wp-admin folder permissions should be 0755, and on other PHP files, it should be 0644.

4. PHP Versions

Our hosting platform allows you PHP changes, starting from 5.3 to the latest 7.3. It’s extremely important to use an up-to-date PHP version because the older version (PHP 5.4, 5.5, and 5.6) will not only not deliver the full potential of WordPress, but will also lead to potential security glitches. You don’t have to use the latest version as it is often incompatible with certain themes and plugins within the first few months of its release, but use a supported current version such as 7.2 or less popular 7.1 (July 2019).

5. Change Default wp-admin Access

First and foremost – prevent third parties from accessing the wp-admin page. This is important for many reasons because even if someone knows your password, they will not know the URL you are using to access the WordPress admin panel. Otherwise, hundreds of bot scripts will attack your site multiple times per day, so why let something like this happen, if you can have it solved in a couple of minutes? 
Simply go to the admin panel, select Plugin then Add new and find the Rename wp-login.php plugin or any similar plugin.

6. Updating

Take some time to choose the plugins you need, because of them represent a certain security risk. Only get plugins that are less than one year old, or use the simple rule, if the plugin hasn’t been updated for more than one year, consider finding an alternative one.

Although the “update” option sometimes messes up, you should update your plugins and themes at least 3 times a year, as attackers often enter through vulnerable themes. Our advice is to completely remove themes you don’t use or set 0000 permissions to their folders. The same goes for plugins. 

7. reCAPTCHA and contact forms

It is advisable to place some type of security checks on pages that require user interaction, such as contact forms or forms, to prevent the accumulation of mass spam messages passing through your site or hosting. The most common CAPTCHA consists of an image with distorted letters, with possible color differences, colorful background, or with the presence of other elements that make it impossible for software to solve the test. 

Almost all known plugins have integration with reCAPTCHA, all you need to do is download the API by accessing from your google account at this link

We think this is enough for today. Until next time… 😉

VPS vs WordPress Shared Hosting: Which One to Go For?

Are you thinking to create your own WordPress website? Well, then you must have made some crucial decisions for taking actions onto them accordingly. Among all these new traits, one of the vital factors which you should consider is the hosting type. This may confuse many but by opting for the wrong decision against the hosting type you can result in negative repercussions.

There are tons of hosting options available in the market for your WordPress website, but among all, there are two main and most used high-level solutions – Virtual Private Server (VPS) and Shared web hosting.

Dedicated Servers are almost always the best option, but it could be a bit pricey for the beginning of your online business journey.

Both VPS and Dedicated are among the high tier of hosting options available for the WordPress websites as they make use of just one server to host a site but in variant ways.

The VPS offers to host on a server which contains virtual divisions and the server can also be split among the various other websites conveying that the resources are limited.

On the other side, a dedicated hosting environment indicates that you have an entire server which includes its various resources or in simple terms, your website is the only one on the server.

In this article, we will be looking at the key points by differentiating between VPS and Shared WordPress hosting and discuss various factors to select which is the best to opt for. Let’s get started!

Server Resources

As the term indicates, the shared hosting customers have to share server resources whereby the dedicated hosting clients get a server dedicated to their sites as per the needs. A VPS is lying in the gray area in the middle of the bulk slices of the same server that acts as their own dedicated hardware entities. There are pros and cons to both spectrum be if VPS or Shared hosting.

VPS Hosting

With the VPS hosting, you can enjoy a greater private deck space and higher availability of the resources overall. This is necessary as if you wish to expand your business and need to offer the customers a rich user experience that goes far beyond the basic shared hosting level.

Shared Hosting

When it comes to the shared hosting, you need to face some limitations as you have to share server resources with others. Amidst no single account can impact anyone’s experience but there will be maximum available memory/RAM, disk space and CPUs. Beyond the maximum allotted resources, your website is not able to use them and this may not be a huge deal if your website doesn’t need a tone of space or processing power.

Performance

You must believe that more resources lead to more performance but the shared hosting is only performant as your host implements the technologies for the speed. You need to have more control over the performance factor with a VPS in certain terms.

VPS Hosting

It is not at all surprising how VPS hosting offers better overall performance based on the bandwidth which it offers to the users. You will have more flexibility for app configuration on the server but still, you need to make sure to have a dedicated system admin for running the server smoothly. VPS stands as a better option if you have high traffic demands or manage multiple websites.

Shared Hosting

As with the shared plan, many other websites can affect the performance of your website as there is a risk you run by opting for the more economical shared hosting plan. If the performance demand of your website is limited and you value the ease of maintenance then the shared hosting is likely to yield a higher ROI.

Security

As the sharing server resources offer huge benefits from a cost point of view as it can create havoc on the security end of the things. It really depends on how much the hosting provider has invested in the operation and financial resources to ensure dedicated security for its shared hosting clients.

VPS Hosting

You need to ensure that the security of your website is more robust and has safety features which are not only available with the help of VPS hosting. If you have got a huge budget, you can implement better customer support services which will assist patrons when they require it. If you want to protect your personal data for the business, it is pennyworth to consider upgrading to a VPS.

Shared Hosting

This option is considered as most safe but be aware as the security breaches can occur simply because of the common server which does not guarantee total security. The reason behind this can be a Noisy Neighbor problem or experiencing a technical difficulty when one shared hosting customer makes any mistake. This is likely going to impact all the other sites because you are sharing the same space on the machine. There is limited customer support as and when compared to VPS hosting. Thereby, if your website does not require any personal data from the users you should not have any issue with the shared hosting plan.

Pricing

The price factor can be very negligible or sometimes a funny thing as you might find yourself paying a hefty cost per month on shared hosting with the poor service or sign up for a VPS for as little as 15 bucks per month and never look back again. Do your math.

VPS Hosting

An expensive plan is gradually going to offer more premium features with any paid service and the same is true for VPS hosting. Hence, if you want to improve the performance of your website or need to increase the online services of your business, then VPS hosting can get you better customization with a better performance option than shared hosting.

Shared Hosting

With the shared hosting plan, you have to pay the expenses as per the maintenance of a server because you are sharing server space with hundreds of other websites as well. From a fair price point, shared hosting can be the most economical choice and becomes a great option for those who are looking to host a website with standard functionality.

Server Admin

In simple terms, the shared hosts handle the hardware for you whereas, in VPS, you are responsible for managing the server unless you choose a host that handles server monitoring, bug fixes, and security patches.

VPS Hosting

The VPS-hosted websites are more complex in terms of resource management and require a specific system administration to focus on server maintenance. The benefits of using VPS is that you are able to customize your website and configure whichever applications and software you want by increasing the performance and security.

Shared Hosting

If you wish to host your website on a shared server then you do not need to have any technical maintenance of the server. This indicates that you can enjoy basic server administration for your site with no additional cost to your budget or precious time. For many website owners, this can be a huge plus as no dedicated system admin is required.

Which One to Go for?

After getting the difference between both the sites, it is vital to decide which hosting plan you want to go for. In the majority of the websites, a shared hosting plan will be more than suffice. But still, if you are looking for a high-end hosting plan then you can try your hands on VPS for better WordPress development.

About the author: HP Morgan is a Tech Analyst at Tatvasoft.com.au, It is Software Development Service provider in Australia. He is having seven years of experience in a Technological domain. He loves to travel to Spontaneous places.

5 First Steps to Secure Your New Website

Launching your first website is truly exciting. Isn’t it?

We know.

You’re full of anticipation for lots of traffic and high conversion rates and engagement. Don’t call us the party poopers, but your high expectations will be short-lived if you don’t take the proper steps to secure your new online asset at every access point.

Websites that are vulnerable to hacking and data leaks are no good for your reputation, and they’ll cause your ranking in searches to suffer.

How can you protect your information and that of your visitors or staff? By following these 5 simple tips that are easy enough for even a complete novice to implement.

Website Security Best Practices

Every stable build begins with a good foundation. That’s why it’s best to incorporate security into your design from the beginning rather than waiting until there’s trouble with your website.

1. Use a Secure Content Management System (CMS)

The first step is to decide how you’ll build your website and manage your content if you haven’t already. Those who are going with a professional web developer have less to be concerned about as long as you’re working with a reputable company or individual. However, you should still emphasize while your website is still in the design stage that the developer incorporate security features that are appropriate for the level of safety you need. Your web designer can also explain the various features, why they’re needed, and how to maintain security after you go live.

If you’re going the DIY route, security will be at least partially determined by the platform you choose. For example, building a website with WIX comes with hosting included, but it’s still up to you to bolster it with anti-virus software, security and access management.

With WordPress websites, you can install firewalls and plugins that improve platform security. Since this platform is not self-hosted, you’ll have to shop carefully for a hosting service that puts security at a premium. More on that in a minute.

One thing you should beware of no matter which platform you choose is the security of plugins and themes. These are third-party add-ons and frameworks that control how your website looks and functions. Most web builders have their own inventory of plugins, but there are also many free and premium addons available on the internet.

Try to stay away from open source libraries because many don’t thoroughly test plugins before adding them to their database. Premium plugins and themes may cost a little extra, but the license comes with support, patches, and upgrades. Some developers who create free add-ons and themes will provide patches and upgrades, but there is no ongoing support or resolution platform for issues that might arise.

2. Control Who Has Access

Unfortunately, too many data leaks and hacks can be chalked up to a simple human error. Even if employees are using their own devices at work or leaving accounts open when using a public network on the road. Or if they’re unaware of security best practices, in the first place.

This is where having an enterprise-wide security protocol can help, but you should make employee education and training a priority. One of the first lessons is to stop relying on staff to create secure passwords. Instead, opt for a password manager software to create unique, hacker-proof passwords for each device and account connected with your network. Among encryption tools, the best password management software applications (we use 1Password, for instance) on the market today incorporate two-factor authentication that requires a traditional password and a key that puts extra layers of encryption between you and the bad guys.

You can control access in other ways, too. Practice a “least privilege” method of control that allows access to certain levels, accounts, or employees according to need. Limiting bring your own device (BYOD) will also reduce risk.

3. Choose a Secure, Reliable Hosting Platform

The second most important security measure is to choose wisely when looking for a web hosting platform. Web development companies sometimes have a hosting service as well. However, if you go with a pro that doesn’t offer web hosting, you build organically from scratch, or you’re using WordPress, you’ll have to find a reputable hosting service. And that is a good thing.

There are literally hundreds of website hosts and servers on the market, as a quick Google search will prove. You can look for a budget plan, but try to stay away from free or shared hosting. Take this one very seriously.

When you’re sharing resources with other website owners, their problems can become your problems, and “free” hosting services may still store and sell your data even if they offer basic security; many do away with security altogether, which is why they can afford to offer free hosting platforms. With dedicated hosting, you have a little more flexibility as far as available resources, but a lot of the security measures rest with you.

The best hosting platforms deploy military-grade 256-bit AES encryption, offer SSL authentication, have built-in firewall protection, and perform regular backups. Just make sure that you have access to their backup system and implement your own security measures on top of what your hosting plan provides. They also guarantee uptimes, bandwidth, and speed (here are some tips for even faster performance), but make sure you get any promises in writing with your service level agreement (SLA).

4. Install High-Grade Security Features

Once you’ve chosen a secure platform, devised and implemented security practices, you need to install protection on each network and connected device. In addition to antivirus, anti-spyware, and anti-malware software, install your own firewall if one isn’t included by your hosting service. Installing a VPN is also a smart choice because it encrypts your data from your router as well as masking your identity, location, and activity.

Configure your router to segment your network into different lines, one for business, one for personal use or guests, and another for any IoT devices. That way, if one area is accessed, your other networks won’t go down with it.

5. Keep Everything Updated

Having all of the most current security features in place won’t protect you for long if you don’t keep them updated. Whenever you can, set all plugins and security software to auto-install updates. Make sure that you’re using the most current versions of all plugins, themes, and WordPress, and keep the firmware for your router and firewall up to date.

One of the vulnerabilities that website owners overlook is right in their databases. Make sure that you completely uninstall any old, obsolete, or unused plugins and themes. Simply disabling them isn’t good enough.

Final Thoughts

Getting your website off the ground the right way involves a combination of solid, responsive design, a reliable hosting platform, and high-grade security. It doesn’t have to cost a lot of money, and the ROI provides value that goes beyond dollars. We hope these security guidelines and best practices will help you get off to a good start. 

About the author: Sam Bocetta is a freelance journalist specializing in U.S. diplomacy and national security, with emphases on technology trends in cyberwarfare, cyberdefense, and cryptography.

Cloudflare Blames Bad Software Deploy for the Outage

It was just a week ago when the internet had a small heart attack. Then, most of the netizens worldwide were blaming Cloudflare, and they had the right to do so, but the issue was a bit more complicated.

A small company in Northern Pennsylvania became a preferred path of many Internet routes through Verizon (AS701), a major Internet transit provider. This was the equivalent of Waze routing an entire freeway down a neighborhood street — resulting in many websites on Cloudflare, and many other providers, to be unavailable from large parts of the Internet. Cloudflare states that this should never have happened because Verizon should never have forwarded those routes to the rest of the Internet.

Cloudflare

However, to be fair, these issues are quite common. Humans make mistakes, but as long as we learn from them, we should be good for the future.

And with that been said, yesterday it happened again. But this time, Cloudflare was indeed the one to be blamed. Bad software deploy, to be exact. Read on for the full update on the issue from the Cloudflare team:


This is a short placeholder blog and will be replaced with a full post-mortem and disclosure of what happened for about 30 minutes yesterday July 2nd,. Visitors to Cloudflare sites received 502 [bad gateway] errors caused by a massive spike in CPU utilization on Cloudflare network. This CPU spike was caused by a bad software deploy that was rolled back. Once rolled back the service returned to normal operation and all domains using Cloudflare returned to normal traffic levels.

This was not an attack (as some have speculated) and we are incredibly sorry that this incident occurred. Internal teams are meeting as I write performing a full post-mortem to understand how this occurred and how we prevent this from ever occurring again.

Update at 2009 UTC:

Starting at 1342 UTC today we experienced a global outage across our network that resulted in visitors to Cloudflare-proxied domains being shown 502 errors (“Bad Gateway”). The cause of this outage was deployment of a single misconfigured rule within the Cloudflare Web Application Firewall (WAF) during a routine deployment of new Cloudflare WAF Managed rules.

The intent of these new rules was to improve the blocking of inline JavaScript that is used in attacks. These rules were being deployed in a simulated mode where issues are identified and logged by the new rule but no customer traffic is actually blocked so that we can measure false positive rates and ensure that the new rules do not cause problems when they are deployed into full production.

Unfortunately, one of these rules contained a regular expression that caused CPU to spike to 100% on our machines worldwide. This 100% CPU spike caused the 502 errors that our customers saw. At its worst traffic dropped by 82%.

This chart shows CPU spiking in one of our PoPs:

Cloudflare: CPU spike

We were seeing an unprecedented CPU exhaustion event, which was novel for us as we had not experienced global CPU exhaustion before.

We make software deployments constantly across the network and have automated systems to run test suites and a procedure for deploying progressively to prevent incidents. Unfortunately, these WAF rules were deployed globally in one go and caused today’s outage.

At 1402 UTC we understood what was happening and decided to issue a ‘global kill’ on the WAF Managed Rulesets, which instantly dropped CPU back to normal and restored traffic. That occurred at 1409 UTC.

We then went on to review the offending pull request, roll back the specific rules, test the change to ensure that we were 100% certain that we had the correct fix, and re-enabled the WAF Managed Rulesets at 1452 UTC.

We recognize that an incident like this is very painful for our customers. Our testing processes were insufficient in this case and we are reviewing and making changes to our testing and deployment process to avoid incidents like this in the future.

How to Troubleshoot a Misbehaving WordPress Theme

Whether you are looking to start an eCommerce business or just a hobby blog, WordPress serves as one of the top blogging platforms on the internet today by market share.

At its core, WordPress is a content management system (CMS) that allows you to build dynamic websites with text, images, audio, and video.

Style is important for any website. If your pages are not visually appealing, you’ll have a hard time attracting users and customers. Thanks to WordPress pages, you don’t have to worry about constructing your own HTML and CSS designs. Instead, you can pick from a large library of WordPress themes to set the colors, fonts, and overall look of your website.

Unfortunately, sometimes you may run into issues after installing a new theme or migrating from an old one. In this article, we’ll run through the ways to troubleshoot and resolve common problems on WordPress.

Cleanse Your Browser

Before you start tinkering with server settings and WordPress configurations, you should make sure the issues you are experiencing are not tied to the browser you are using on your local computer. Browsers like Google Chrome and Mozilla Firefox use a system of caching to help websites load faster. As a result, sometimes they do not pick up HTML or CSS changes immediately.

To make sure you are testing your WordPress page with a completely fresh browser, go into the application settings and clear all cookies, cache, and saved data. Then restart the browser and load your primary WordPress URL again. If the theme is still presenting an error or not loading correctly, then you should proceed to the next step.

Check PHP Memory Settings

If you are trying to install a complex WordPress theme, there is a chance that your backend application server is running out of memory and causing the website to display an error message with code 500. Fortunately, with a quick code change, you can up that limit and test the website again.

The WordPress platform uses the PHP coding language in the backend and relies on a hidden file called .htaccess to control various configuration settings. To modify it, browse to the “wp-admin” folder on your live application server and open the .htaccess file in a text editor. Then enter the following line and save the changes: php_value memory_limit 256M.

To make the new memory limit take effect, you will need to restart the backend server and the WordPress application. If your web pages continue to display errors or fail to load, then the memory size is likely not the root cause of the issue.

Disable Plugins

WordPress users can only enable a single theme at a time for each of their websites or blogs. However, with the use of third-party plugins, additional functionality can be incorporated to modify how a theme looks or responds. The bad news is that since these add-ons are created by outside developers, they will not always be compatible with the WordPress theme you have chosen.

After installing a new theme or migrating to a new WordPress environment, there is a chance that incompatibility with plugins could make your entire website unusable. If this happens, you should immediately log in to the admin console using your credentials. Then select the “Plugins” menu from the left navigation bar to see a list of all add-ons being used in your WordPress environment.

To be safe, it’s recommended that you click the “Deactivate” link next to each individual plugin to reduce the chances of one interfering with your WordPress theme. If the theme starts functioning properly again, then you can reactivate the plugins one at a time to determine which one is causing the problem or is incompatible.

Confirm URL Settings

In some cases, switching to a new WordPress theme may negatively affect how the URL of your website functions. For this reason, it’s important to test your web address settings after making any theme-related changes. To do so, go back to the admin console and navigate to the “Settings” menu on the left navigation bar.

Scroll down and look for the two fields labeled “WordPress Address” and “Site Address.” Both of these URLs should match and with http:// or https://. Keep in mind that you will need to own an active domain name, like a .com or .net, in order to configure it with your WordPress site. If either of the URL fields are incorrect, make the appropriate changes and click the “Save” button.

Tweak Link Settings

Besides customizing the look and feel of your website, a WordPress theme can also affect how your individual pages are grouped and arranged. For example, a new blog theme might collect all of your posts based on the month they were created in, instead of based on the keywords you’ve tagged. As a result, you may need to troubleshoot your link settings.

The term permalink is used to describe any URL that is meant to remain static so that it can be bookmarked or archived and the link to it is never lost. WordPress allows users to choose how their permalinks are configured through the “Settings” area of the admin console.

Once there, choose the format that you prefer. You can pick between date-based links, numeric links, or links based on the headlines of content. There is also an option to create your own custom permalink format, but this is not recommended if you are already having page issues with your theme. Click “Save” when you are ready and then wait a few minutes for the link changes to be made across your site.

Consult With Your Host

In the early days of the WordPress platform, most users would install the codebase on their own private server being run from a home or office. The cloud computing movement has completely done away with that model, with the majority of WordPress sites now hosted in shared data centers through cloud providers.

Many service providers include WordPress hosting as part of their monthly packages, often with a simplified one-click installation process. It’s important to comparison shop when looking for the best WordPress host, prioritizing flexibility, reliability, and security in particular. Also, look for a hosting service that offers individualized support with technical experts who can help troubleshoot errors specific to a custom WordPress theme.

For problems with WordPress themes, your hosting provider should be able to examine the back-end architecture of your website and determine if the source of the issue exists there. Your installation may need to be moved to new hardware or a different data center. In other cases, a network routing change might be required to get your site in a healthy state.

Revert to a Backup

If worst comes to worst, you always have the option to switch your WordPress site back to a standard theme or else revert to a backup. Some users may choose to set up a third-party plugin that will automatically capture snapshots of their WordPress code and theme over time. However, most cloud hosting providers will also include a backup service with a host subscription.

Be aware that most WordPress themes will receive updates periodically. These changes could be to fix known bugs or add new features. In either case, it is best practice to perform a full site backup before updating any theme files, as there is a chance something could go wrong and you might encounter unexpected errors.

Final Thoughts

WordPress is a powerful and flexible platform for building modern websites and filling them with content. But given the complexity of the underlying system and code, certain errors or issues may arise over time. If you have recently switched to a new WordPress theme, it could create problems related to your site’s configuration.

In the future, you may also want to consider adding a secondary environment to your WordPress installation. Many companies use what’s known as a staging environment to experiment with theme and code changes before pushing them up to the live production system. The goal with this is to reduce the pain of downtime for both site users and yourself.

About the author: Sam Bocetta is a freelance journalist specializing in U.S. diplomacy and national security, with emphases on technology trends in cyberwarfare, cyberdefense, and cryptography.

Hacked Website Can Cost You a Business, Be Cautious

According to statistics, hackers hack about 20-30 thousand websites around the world. Among them may be simple websites, business cards, consisting of several pages, as well as corporate resources of substantial companies. Below we briefly describe several significant hacks that have occurred recently.

In February 2014, the Forbes website was severely damaged. The hacker attack was organized by representatives of the so-called Syrian e-army in retaliation for the publication of information materials about Syria by this publication. Because of the attack, the personal data of millions of website users (email, usernames, passwords, URLs) were made public. Besides, hackers posted fake news on the Forbes pages.

In January 2014, the leading resource Snapchat was hacked. According to hackers, this was done for demonstration purposes (to draw the attention of resource owners to system vulnerabilities). Because of the attack, phone numbers, and logins of approximately 5 million users were made public.

In October 2013, hackers managed to hack into the Adobe website. The scope here was, about 150 million user accounts suffered (logins, passwords, password hints, and email addresses were revealed).

During 2011, hackers attacked Sony’s websites at once several times. Most of all “got” the user accounts of Sony PlayStation, as well as the user accounts of the resource Sony Pictures, disclosed personal data – names, dates of birth, as well as email, phone numbers, and logins.

What to do if the website is hacked

With hacked website, all site data is at risk – personal payment information, customer base, portal files, etc.

First, you need to check your website code for vulnerabilities, if it is — immediately close it. Take into account the fact that once hacked resource, hackers will leave a loophole for re-hacking. It is necessary to perform a comprehensive analysis of the website, entrusting this matter to a highly qualified professional. Only this person will be able to calculate such moves of the intruders and cut off the oxygen with them.

Let’s analyze the systematic instructions of your actions when a hack is detected:

Check your computer or laptop for viruses. To do this, you can use both paid antivirus programs and their free counterparts, which are freely available.

Download and install the FireWall program. It will allow blocking access to the penetration of the program of intruders that could cause damage to equipment. Firewall can be said to be paid or free, and they are equally valid.

Notify your hosting provider about what happened. Most likely, not only your resource has been hacked, but also other websites that are hosted on the same server. Ask the provider to analyze the hacking, to identify the reasons.

Change all your passwords, all resources, and sections.

Tell visitors to your website customers about what happened and that they should be careful. Encourage them to change the password from the personal account on your website.

Back up your data and files

Check the file type .htaccess. Most often, hackers change their code to redirect users to their resources.

Prepare for what may have to delete existing files. The attackers could hide the access code in one of the data so they will have to be removed. In the future, you can restore files using the backup.

Upgrade to the latest version of CMS.

How to protect the website from hacking

To understand how to protect your website, you need to consider the basic methods of hacking and means of countering them.

Install good antiviruses. The most common reason for hacking is virus software on the administrator’s computer.

Create complex passwords for admin panel and FTP client. The simpler it is, the higher the likelihood that an attacker will pick up a password.

Regularly update the CMS. No one is immune to vulnerabilities. Keep track of the relevance of the CMS version so that the hacker cannot take advantage of system vulnerabilities.

Host one website on a particular web hosting package. Having cracked one resource, the swindler will get access to other portals that use the same account for FTP.

Restore the website after the attack is severe. It is easier not to allow it. Keep all data secret and do not trust strangers.

There is a reasonable question – why hackers hack someone else’s website? What is the point of this? The reasons for hacking the site may be several. Below we list the most basic.

1. For the sake of interest

Strange as it may seem, many websites are hacked simply because they can be hacked (we are talking about relatively simple and weakly protected resources).

People want to annoy someone else, make it unpleasant. Yes and his pride with a marked increase.

2. For revenge

In some cases, websites hack because of personal dislike for the webmaster or administrator.

For example, a person was banned on some forum (for an objective or subjective reason). He wants to take revenge on his offenders. One way to do this is to hire a hacker and hack the forum.

An author’s blog can also be hacked (for example, if the opinion of this author is radically different from the idea of the user who resorts to hacking). In other words, in all cases, personal hostility is involved.

3. To fight competitors

For this reason, corporate websites are most often hacked (to reduce the profits of competitors, add additional problems to them).

It is clear that it is challenging to completely steal the website (and everything connected with it), but it is quite realistic to disable it for a while, and during this time, competitors will certainly lose a large number of potential customers.

The higher the degree of competition in the subject, the higher the likelihood of hacking.

4. For sending spam, for DDoS

Sometimes hacking is not the ultimate goal, but one of the steps to achieve this goal. For example, a hacked website can be used for subsequent advertising of its goods and services, for sending spam messages. In this case, you will not risk anything (the responsibility for the newsletter will fall on the hacked website).

Besides, hacked resources are often used as websites for DDoS attacks. DDoS is short for Distributed Denial of Service. It means that so many requests from different Internet access points are sent to the attacked website (the so-called “DDoS victim”) that the site “crashes” and stops working.

5. To host external links

In this case, we are talking about large visited websites that have good TIC and PR. TIC means thematic index of citing reflecting trust level of the website while PR means page rank, which was input by Google back in the year 1996 for numerical reflection of trust of a web page for search engine. After hacking such websites, hackers place their links to the resources they need to build up SEO indicators.


About the author: Melisa Marzett is a freelance writer who is working for essay-editor.net for quite some time now and gained experience of an expert in the area of writing. She is a movie enthusiast who is a good listener and always ready to help. She likes people who are creative and can do something with their hands.

How to Backup And Migrate Your WordPress Website

Are you thinking to migrate your WordPress site from the current ones to a new hosting company or a new server? When moving from web hosting or migrating a website to a new server the risk can be associated with data loss and downtime. Both the factors can make the site inaccessible to users temporarily which will eventually result in loss of sales and search engines rankings. In this article, we will be showing you how to migrate your WordPress site safely to a new host without any downtime.

Are you ready? Let’s begin.

Select a New WordPress Host

If you feel like getting stuck with slow web host even after boosting your WordPress speed and performance but it’s the right time to migrate your site to a new host which can handle your growing traffic. There are numerous options when coming to website migration.

Of course, you can always go for AltusHost’s Pure SSD VPS or Dedicated server packages. If you are looking for a managed WordPress hosting then we are here for you also.

Do not try to install WordPress after buying a new hosting as for now you need to completely empty your new web hosting account files and folders in your main directory.

Easy-moving by setting up Duplicator

All you are required to do is install and activate the free Duplicator plugin on your website which you want to migrate. It is a free plugin what allows moving your website to a new domain name without losing SEO. Once you have activated Duplicator, select the packages page from the WordPress admin area. Then after, click on to create new packages and follow a few steps to create the one. The whole process may take up to several minutes to complete.

Import to the New host

After completely downloading your archive and installer files, you need to upload all of them to your new web host by using FTP. In general, you need to enter your website’s domain as host when trying to connect your FTP client. You will need to connect by giving your server’s IP address or hostname if it still points to your old host. You can get this information from the cPanel dashboard of your new hosting account accordingly. If you cannot find out this information than you can ask for support at your new web hosting company to help you out. Just make sure your root directory is totally empty as you need to delete the WordPress first before installing it in your root directory.

Rename the host files

You need to access an installer.php file in a browser after you have uploaded both the files to your new host. However, when you enter any URL into your old web host it will return a 404 error which indicates that your domain name is still pointing to your old web host. It is generally advised to change your domain nameservers and point it to your new hosting company but this can lead to break your website. The host files are used to map your domain names to a specific IP address. This lets you trick your computer in thinking whether the website is moved to a new host or not.

Creating a new SQL database on the new host

Before you run the installer on the new host, you are required to create a MySQL database on your new hosting account. After creating the database, add users to it which will generate username that gives all the permissions to work on that database. Now, your database is ready to be used with WordPress and make sure to secure database name, username and password.

Begin with the Duplicator for the Migration process

Now it seems that you are ready to run the installer by navigating to the following address in your window browser by replacing it with your domain name. This will let the installer run a few tests and show you an option to pass next to archive for validation tests. It is required to check the terms and conditions checkbox by continuing to click on the Next button.

You will be further asked to enter your MySQL host, username, database name, and passcode. Your host can likely be localhost after entering the details of the database you have created above.

Select on a test database to ensure you have entered the correct information. If your duplicator is able to connect then you will notice a string starting with Pass. If not, then you can see the database connection error details. The duplicator will import your WordPress database from the archive zip into your new database.

Further, it will ask you to update your site URL or path as you’re not changing the domain names you don’t really need to change anything else. After this, you can check by logging in your WordPress site on the new host to make sure everything is running well.

Updating your DNS (Domain Name Servers)

It is the point where you have almost created a complete copy of your WordPress database and files from the old server to the new hosting server. To update your domain, you need to switch your DNS nameservers to ensure that the users are taken to the new location of your website when they type the domain into their browsers.

If you are going for Domain.com or GoDaddy then you need to update your nameservers. You will also need the DNS nameserver information from your new web host. This will get you successfully change the nameservers on your domain as DNS changes might take long hours to propagate for all the users.

As you hold the same content on your old host and the new host, in general, your users cannot see any major difference. Furthermore, your WordPress migration will be seamless with no downtime absolutely. Still, to be on a safer side, it is always a better option to cancel your old hosting account after a week to check if it’s running properly on new ones.

Keep on Learning!

About the author: Olivia Diaz is working in WordPress development company eTatvaSoft.com. She is passionate about tech news and loves to share her ideas on different development topics such as Magento, Angular and many more.